Outlook for Mac Notification Center New Message Alert

Using MacPorts, there is a program called “Terminal Notifier” that can send alerts to Notification Center in Mountain Lion based off of a command line entry and thus an Applescript. Obviously, you can have a lot of fun with that – but I specifically found it so that I could send a new message alert from Outlook because Microsoft only has such a notification appear on the active desktop and I use several of them in Mission Control. I compiled this information from these sites:

http://osxdaily.com/2012/08/03/send-an-alert-to-notification-center-from-the-command-line-in-os-x/
https://github.com/alloy/terminal-notifier

https://github.com/goosetav/Microsoft-Outlook-Growl-Notifications/blob/master/Register%20Outlook%20with%20Growl.applescript

To get this to work isn’t so bad once you have MacPorts installed, which I’ve referenced earlier.

  • Assuming MacPorts is already installed, run the selfupdate command (also listed in that earlier post).
  • Install Terminal Notifier:
    sudo port install terminal-notifier
  • Download and put this AppleScript into your Documents/Microsoft User Data/Outlook Script Menu Items (you don’t have to put it there, but just for organizational sake, might as well). Sure it says Growl in everything below as that is what I originally used it for but then changed it to accommodate Notification Center instead:Improved Growl New Mail.scpt
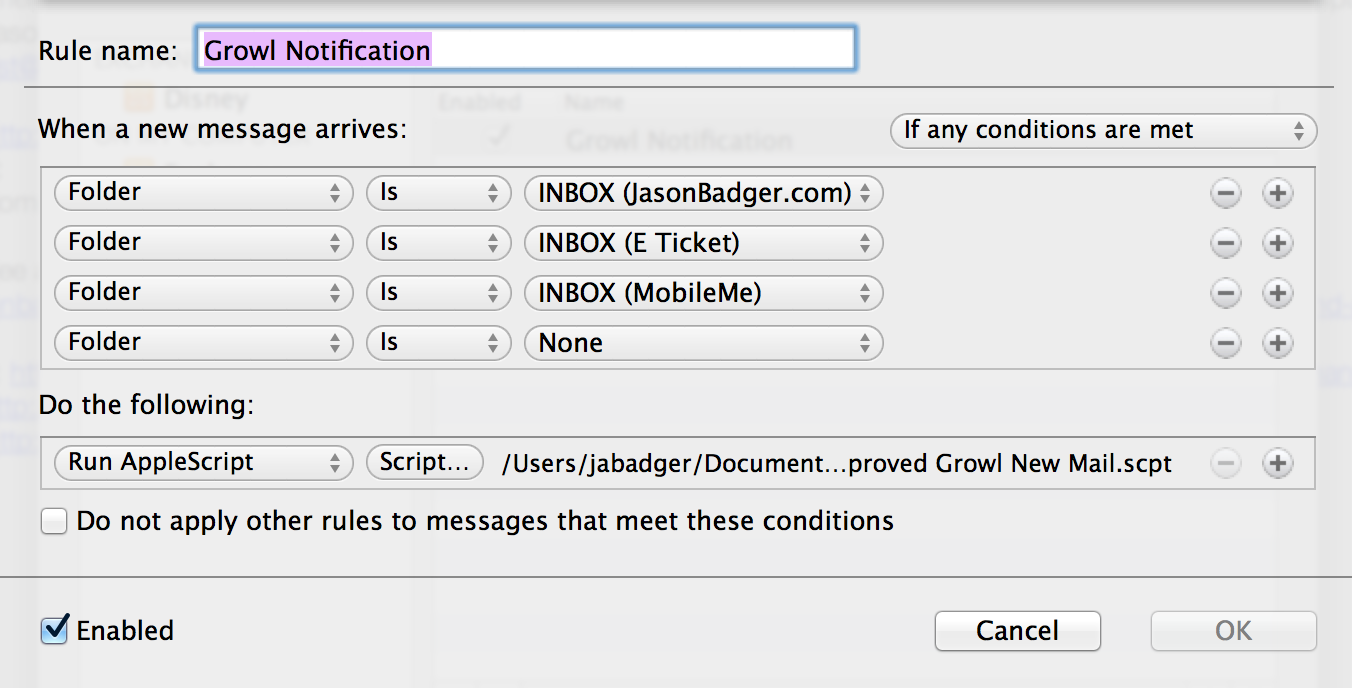
  • In Outlook, create a new rule that will run the script based on your criteria. Here’s mine:
    blog_outlookrulesnotificationcenter

That’s all there is to it.

-j

MacPorts Installation and Sending UDP Messages from the Command Line and Applescript

UPDATE: A very easy tool to send UDP commands can be found here http://packetsender.com/

Spurred on by one of my colleagues, I found a way to be able to send UDP messages from the command line without a lot of fuss. Granted, you do have to install some things on the backend, and any applescript you make wont be able to run on any computer unless this same process has been completed, but it’s still useful if you need to send UDP messages (say to a Pharos/Mosaic/Eos). This was all done in Mountain Lion 10.8.2:

  • Follow the instructions here up to the point where it gets you to install the game – don’t do that. They refer to Darwin Ports everywhere – it’s actually called MacPorts now.
    http://www.nzmac.com/features/how-to/installing-unix-software-on-a-mac/continues.html
  • You can find the install for MacPorts here:
    http://www.macports.org/install.php
  • When in the instructions on the nzmac.com site, it tells you to change to the darwin ports directory, this is the command instead:
    cd /opt/local/var/macports
  • Anytime you see “dports” substitute “macports”.
  • After you’ve gotten through all the above, you’ll want to install the program “socat” which will allow you to send the UDP messages:
    sudo port install socat
  • Once that has installed sucessfully, you should now be able to send UDP messages now like the following. You would replace “HELLO” with the text you wish to send and then change the IP and port number to the device you’re sending to:
    echo "HELLO" | socat – UDP-DATAGRAM:192.168.0.255:5000,broadcast

Now for the actual Applescript, that part is easy, you just have to insert a “do shell script” command into an applescript where you can ask for variables, etc.  Here’s an example:

set UDPstring to the quoted form of "Hello_Does_This_Work"

do shell script "echo " & UDPstring & " | opt/local/bin/socat - UDP-DATAGRAM:192.168.0.255:5000,broadcast"

MacPorts has some other fun things you can install, like Terminal Notifier for instance. Here are some commands to remember:

  • To make sure that your installation is up to date and to upgrade anything you may have installed through MacPorts, run these two commands:
    sudo port -v selfupdate
    port upgrade outdated
  • To search for a particular program or to list all the programs (replace {name} with your search criteria:
    port search {name}
    port list
  • Finally again, to install a new port, the command is:
    sudo port install {portname}

As usual, YMMV and always backup your computer before you do something you’re unsure of.  Good Luck!

-j