
The past few years I have been using Pharos and Mosaic for all of my attraction programming (and some other random stuff too) and amidst debugging I heavily rely on the logs to see what triggers it’s getting and how things are playing in real time; Which is something the Web Interface in Pharos/Mosaic doesn’t show well in its update every 4 seconds or so. There are quite a few good SysLog Servers you can install for Windows but for Mac you don’t need to because you have one built in, in the form of the Console application. It just requires a few settings to ‘unlock’ that functionality. Before you get started on all the below, I recommend you go install XCode (in the Mac App Store) right now. Later you’re going to need to edit a bunch of preference and conf files – XCode will ensure that things stay in check easily when you save them after editing.
I pulled this information from the following websites:
http://wiki.springsurprise.com/2010/01/30/enable-remote-logging-on-mac-os-x/
http://wiki.mikrotik.com/wiki/OS_X_Lion_as_a_syslog_server
Setup (using XCode)
Apple provides the Property List Editor utility as part of its developer tools (XCode). The developer tools are usually a separate install from the operating system and is frequently not installed on systems. If it is present, then using the Property List Editor may be the most convenient means of modifying the com.apple.syslogd.plist file.
- Login as administrator to the logging host
- Open the /System/Library/LaunchDaemons/com.apple.syslogd.plist file using XCode.
- Select the “Sockets” dictionary entry and “Add Item” to create a new key in the “Sockets” dictionary
- Change the name of the item to “NetworkListener” and set its type to “Dictionary”
- Select the “NetworkListener” dictionary entry and “Add Item” to create a new key in the “NetworkListener” dictionary
- Change the name of the item to “SockServiceName”, its type to “String” and its value to “syslog”
- Select the “NetworkListener” dictionary entry and “Add Item” to create another new key in the “NetworkListener” dictionary
- Change the name of the item to “SockType”, its type to “String”, and its value to “dgram”
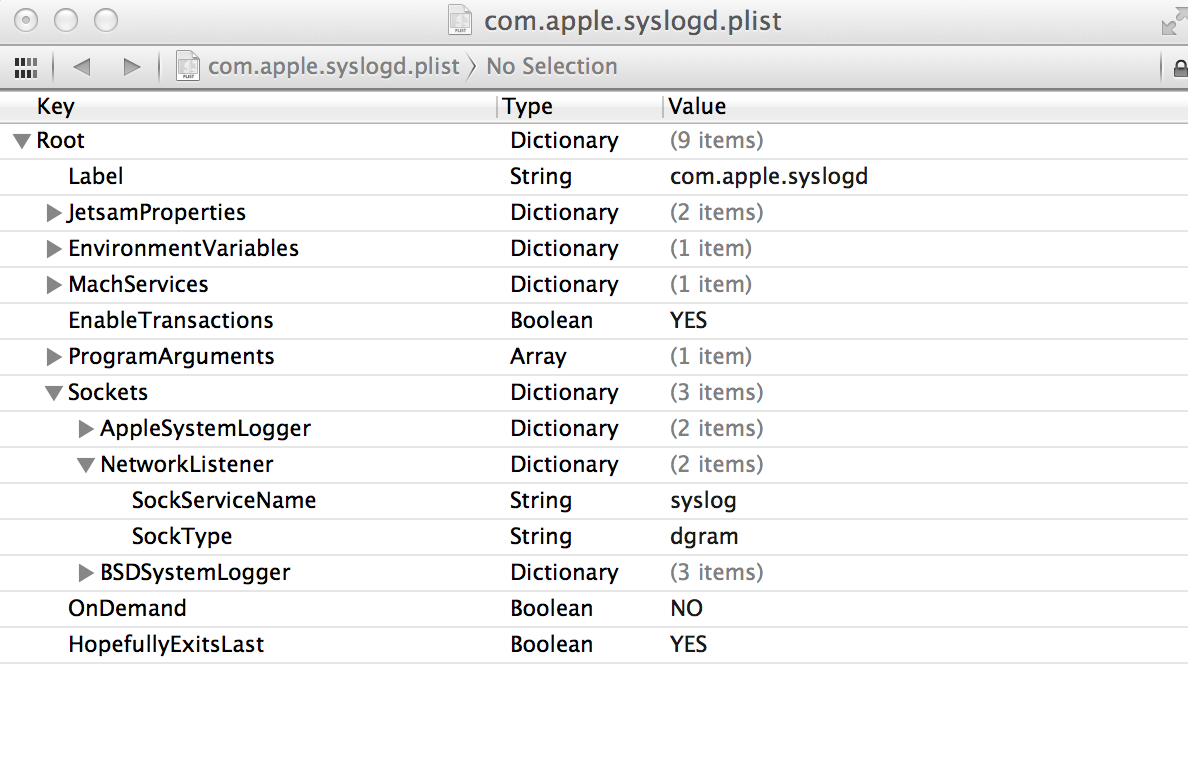
- Save the file and quit XCode. The property list should resemble the following example
- Open a terminal session using the Terminal utility
- Navigate to the LaunchDaemons directory
cd /System/Library/LaunchDaemons
- Stop the currently running instance of the syslog daemon
sudo launchctl unload /System/Library/LaunchDaemons/com.apple.syslogd.plist
- Restart the syslog daemon to pick up the changes in the LaunchDaemon configuration
sudo launchctl load /System/Library/LaunchDaemons/com.apple.syslogd.plist
OS X can use normal log files like any BSD, but it also comes with a built in data store for log messages. Data stores are fast, log rotation comes built in, and they are indexed and quickly searchable. I like my network syslog files routed to a different data store. Data store routing is configured in /etc/asl.log. Filtering can be done on a number of fields, the simplest one is “Host”, which will be the router name taken from “/system identity”. The “Sender” field is taken from the prefix configured under “/system logging” for the topic. I store my Pharos syslog messages in /var/log/pharos in data stores named by date in /var/log/pharos. The directory has to exist, the below creates it with read access for everyone on a directory level (everyone can list files):
sudo mkdir /var/log/pharos
sudo chown root:staff /var/log/pharos
sudo chmod 0755 /var/log/pharos
- Find the file /etc/asl.conf and copy it to the desktop (maybe make two copies of it for when you mess up!). Open asl.conf in XCode and add the lines below to the end of the file to make the Pharos/Mosaic point its data to the above directory (lpc entries are relevant to Pharos, msc to Mosaic. You may omit the ones you don’t need):
# dont post messages to all messages
? [= Sender lpc] ignore
? [= Message lpc] ignore
? [= Sender msc] ignore
? [= Message msc] ignore

# save pharos log files
? [A= Message lpc] store_directory /var/log/pharos uid=0 gid=20 mode=0644
? [A= Sender lpc] store_directory /var/log/pharos uid=0 gid=20 mode=0644
? [A= Message msc] store_directory /var/log/pharos uid=0 gid=20 mode=0644
? [A= Sender msc] store_directory /var/log/pharos uid=0 gid=20 mode=0644
- Using Terminal, move (sudo mv in unix speak) your new edited asl.conf file from the desktop to /etc/ and overwrite the file there. This process seems to screw up the permissions on the file so run ‘Repair Disk Permissions’ in the Disk Utility app to fix it.
- Finally, restart the syslog daemon to have all the changes take effect:
sudo launchctl unload /System/Library/LaunchDaemons/com.apple.syslogd.plist
sudo launchctl load /System/Library/LaunchDaemons/com.apple.syslogd.plist
- On the Pharos/Mosaic Network Tab, configure the syslog entry to point to the IP address of your mac and I also recommend changing the level to ‘Verbose’ (you can also change this in the Web Interface under the Configuration tab).
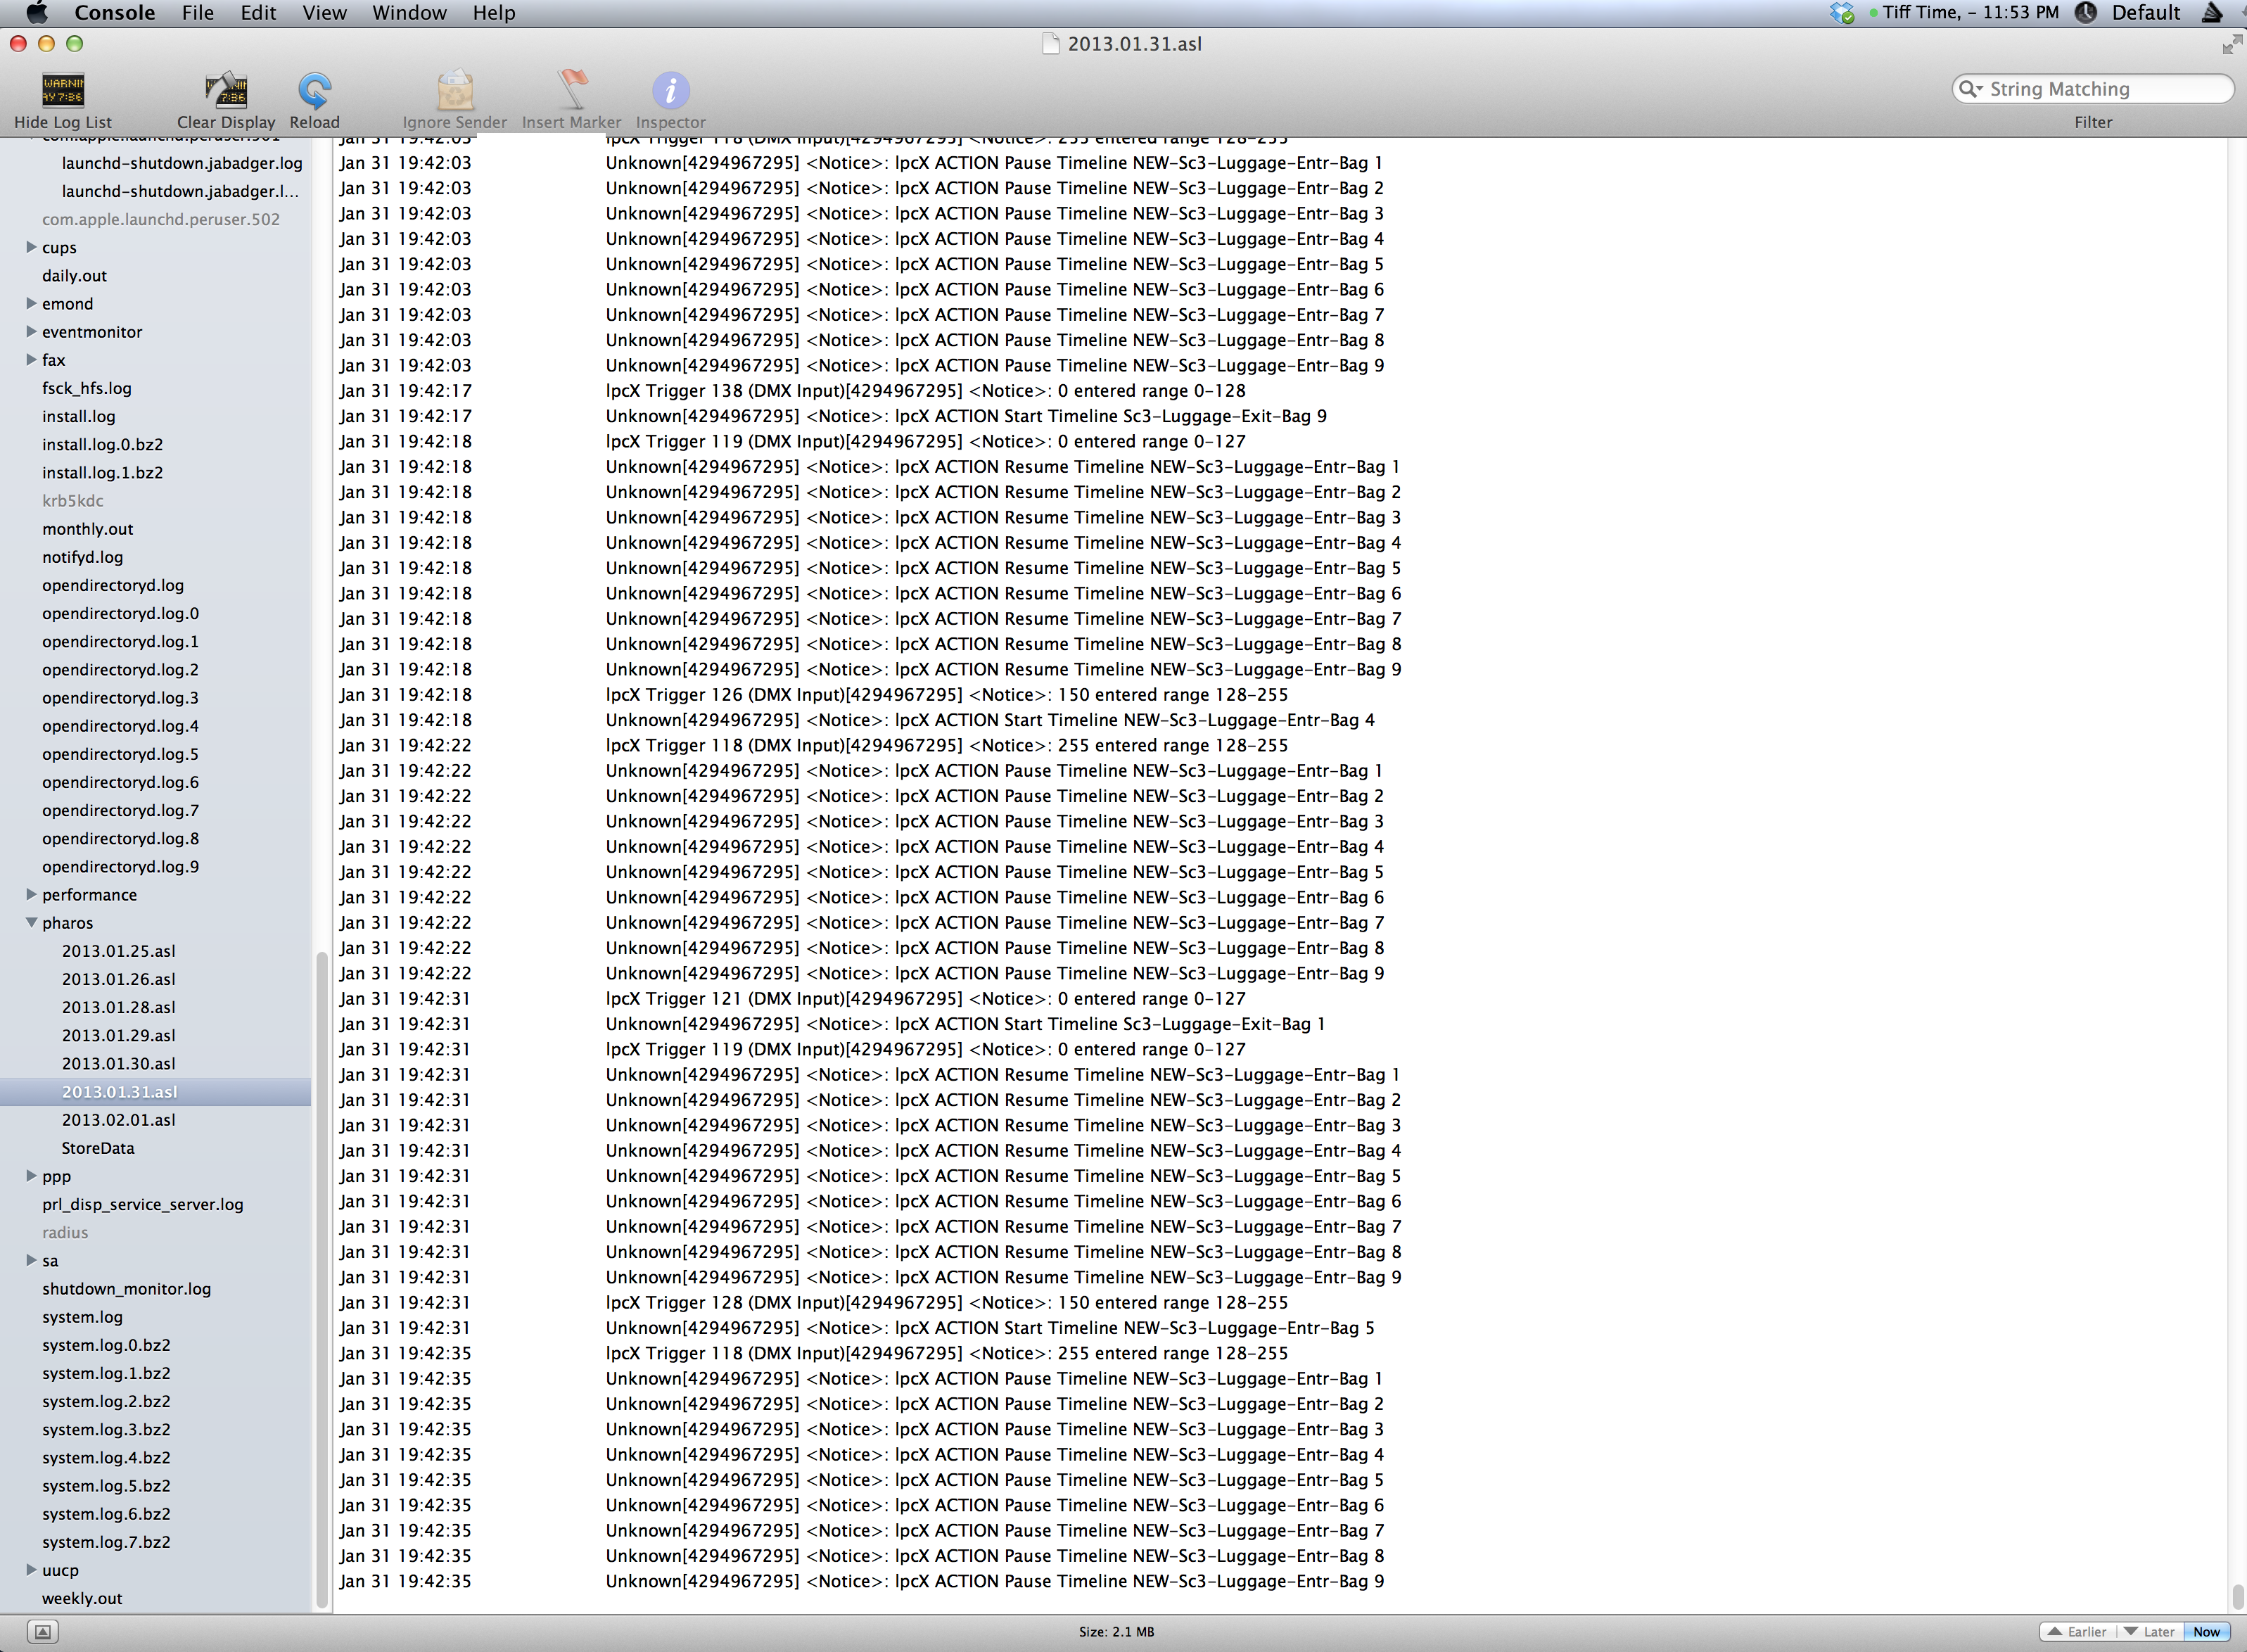
That should be it! Hopefully when you open the Console app and scroll down you should see your Pharos entry (obviously if you’re using Mosaic, just replace all references to that name in the above instructions). Here’s what mine looks like – I’ve blocked out the IP address next to the date (it’ll display the IP address of the controller sending you the info) but you get the idea.
-j